Labels

General (3) Guidance (10) Pattern (10) Project (14) Tunisian (3)

Sunday, December 28, 2014

Iin Wibisono's Strawberry stitch with a Twist

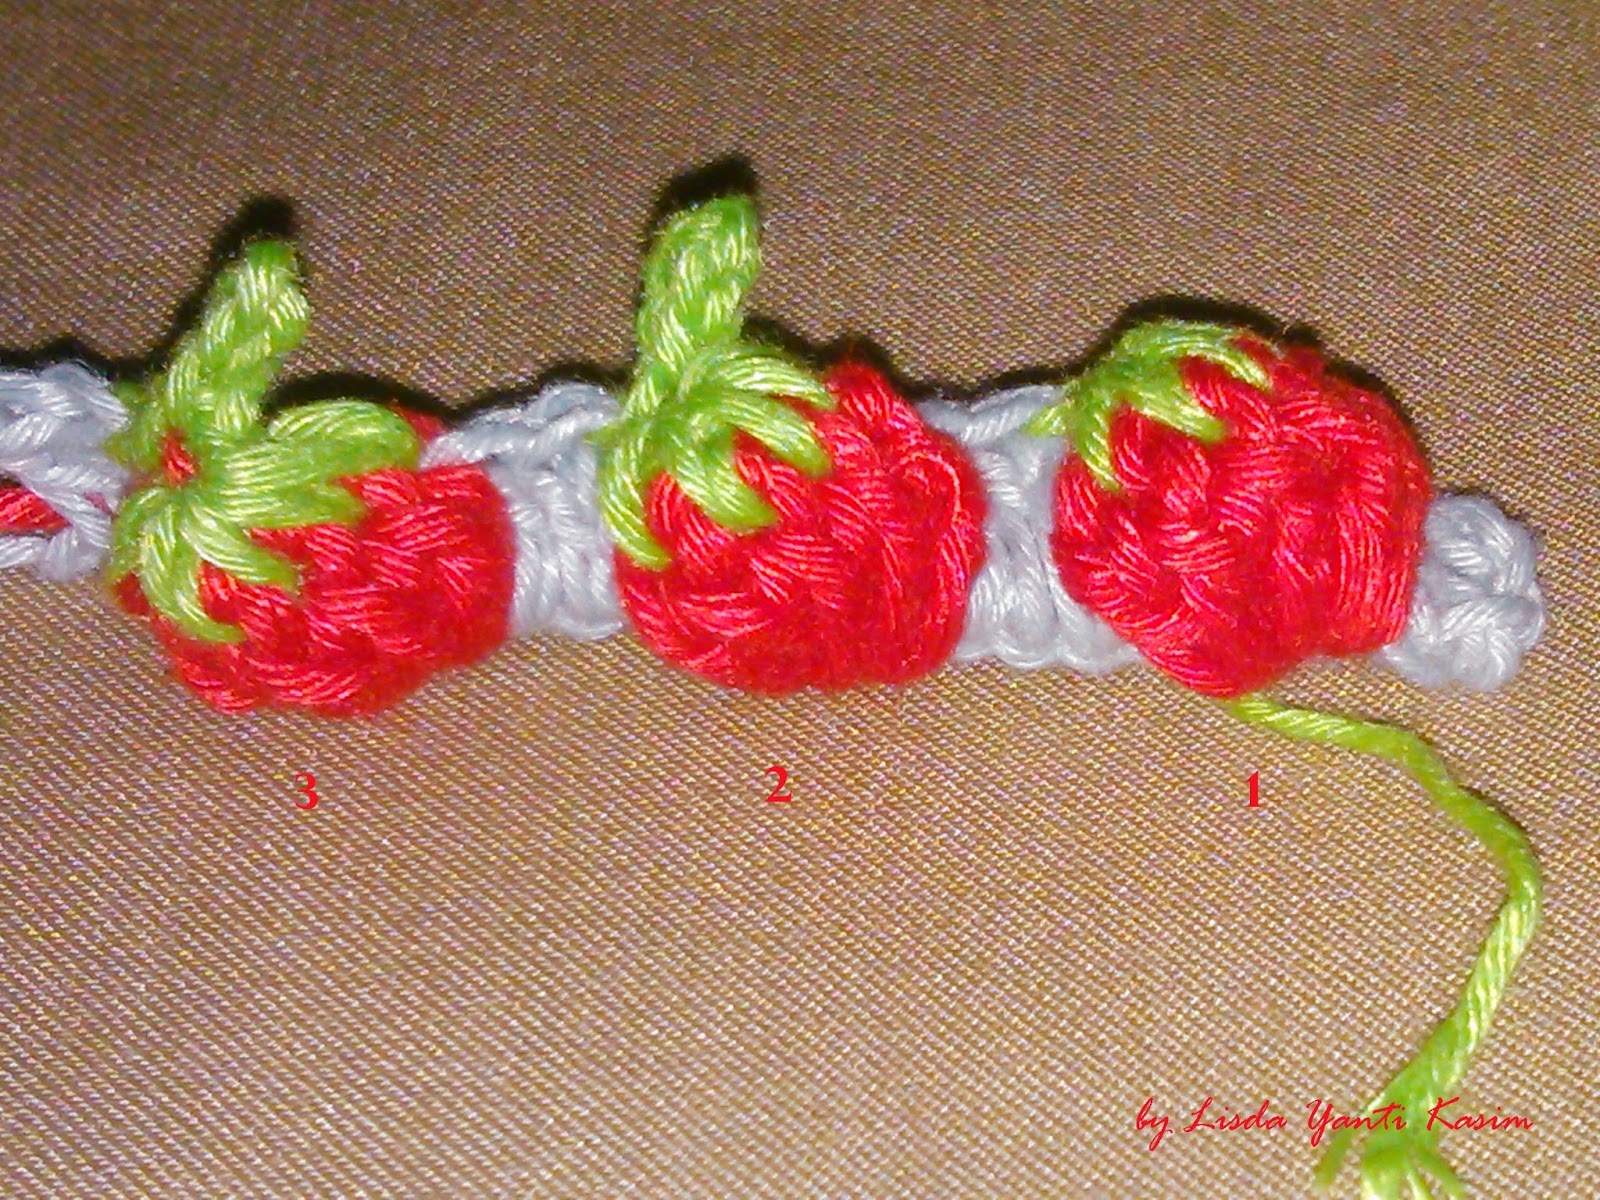
Inspired by the Strawberry stitch that was created and designed by a friend of mine Iin Wibisono, I made this bag, however I modified little bit the shape of Strawberry which I added stem to it and use different technique to make the Strawberry motif. It is my habit and nature to modify a pattern whenever I might be able to modify; sometimes because to make it look nicer or easier for me or depend on the project I make.

I don't create and design this stitch or motif. It is only a development of Strawberry St. The designer (Iin Wibisono) named this modification "Strawberry stitch with a Twist"

The original design, pattern and tutorial of Strawberry Stitch just click the name.


In this image I show 3 different way of Strawberry Motif:
1. I follow exactly the original pattern of Iin Wibisono's Strawberry Pattern
2. I still follow her Strawberry st however I added stem to it.
3. I use different technique (you can see below the diagram I used)


This is the simple diagram:


To see step by step how to make this Fruit Motif
It is not in video presentation but only like in power-point presentation.

Thursday, November 27, 2014

My Heart - two in one amigurumi pattern

Assalamu ‘alaikum wa rahmatullahi wa barakatuh : السلام عليكم ورحمة الله وبركاته 
(May the peace, mercy, and blessings of Allah be upon you)

I believe there are so many designs and techniques to make amigurumi 'heart' shape.
Inspired from several way to make it, this time I try to design my own amigurumi "Heart" shape.
 I know, I do not use new technique but just little bit different shape than other "Heart" amigurumi.


Pattern Abbreviation:

Ch – chain                                                                  
Sc – single crochet                                                     
Lp – loop                                                        
Sl st – slip stitch
Sc4tog – 4 single crochet together
Sc3tog – 3 single crochet together
Sc2tog – 2 single crochet together

Here step by step to make "My Heart":

Note

  • I worked in continuous rounds (vs. joined rounds) all the way to the end. 
  •   What I mean with “joining st” – the sc that connecting part 1 and part 2 of Heart shape.


Part 1:
*Make magic ring
Round 1: 6 sc into magic ring
Round 2: 2 sc into next 6 sts - total st 12 
Round 3: (1 sc into next st, 2 sc into next st) 6 times - total st 18
Round 4-6 : 1 sc into next 18 sts, fasten off


Part 2:
Repeat from * with in round 5,
Round 6: 1 sc into next each 15 sts, (take out hook from lp, now joint part 1 and part 2: insert hook into a st in  part 1 and then insert into free lp of part 2, pull through out the st, 1 sc into next st of part 2) 3 times. Now both parts already joint together. You can give marker into last st that you just made.


Round  7 : 1 sc into each sts around part 2 until remain 1 st before the joining st, sc4tog, 1 sc into each sts around part 1 until remain 1 st before the joining st, sc4tog.


Here is the image showing to make sc4tog from one side.


Round 8 :  1 sc into each sts around part 2 and part 1 (no decrease in this round)


Round 9 : 1 sc into each sts around part 2 with in the center (st between the two parts), sc3tog, 1 sc into each sts around part 1 with in the center of other side, sc3tog


Round 10 (Long shape heart): [1 sc into each sts around part 2 with in the center (st between the two parts or the decrease st below), sc2tog, 1 sc into each sts around part 1 with in the center of other side, sc2tog.] Repeat [] until remain 1 st, sl st into remain st. Fasten off


Round 10 (For small heart): *1 sc into each sts around part 2 with in the center (st between the two parts or the decrease st below), sc3tog, 1 sc into each sts around part 1 with in the center of other side, sc3tog.* Repeat ** until remain 1 st, sl st into remain st. Fasten off

Note: By continuously repeating ** or [] of this round will reduce the number of sts at each following round.
Don’t forget to stuff in the heart shape few rounds before you reach the end or round

Now “My Heart” is complete:

Long Shape Heart


Small Heart


Can be for Key Chain


Selamat mencoba …. (Good luck)
Happy crochet…. 

#twoinoneheartpattern ; #heart ; #amigurimu ; #crochet

Thursday, November 13, 2014

Blocking in crochet or knitting using marbles

Assalamu ‘alaikum wa rahmatullahi wa barakatuh : السلام عليكم ورحمة الله وبركاته 
(May the peace, mercy, and blessings of Allah be upon you)

Blocking is an important part in crochet or knitting to give nice final result. There are several way to block crochet or knitting. To get more clear and details meaning about blocking, you can refer here

To be honest, I had never really blocked my crochet or knit like the way advised in some books I have read i.e. using specific media, pin and spray.  What I did was; After I finish crochet work, I washed it and then hang it to dry. Before it got completely dry, I ironed it with medium heat. The way I ironed it was; I put the iron on one part, pressed it for few second at the same time stretched out little bit at the edge of the crochet to shape it, and the move on to next part. I did like this to whole part of crochet till completely dry. I did not know whether this was correct way or not but anyway it worked. I don't know whether I can call this way is as one of blocking technique. By the way the material of my crochet was cotton thread, so might be won't work for other type of thread or yarn. One reason I did this way because I did know how to block crochet cloth due to it was not flat item.


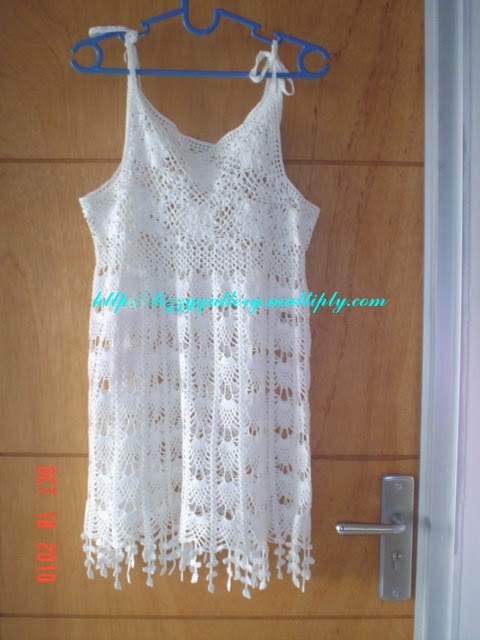
Last year (2013),  I made a  full crochet long dress, I couldn't determine how many round I should made exactly because it would stretch down. I had an idea to hang it and give weight to stretch down. I needed something small and heavy so I could  hang them at the edge of dress. The first thing came out of my mind was small stone because there were many small stone on front yard. So I picked several stones in similar weight. I used plastic strap to tight the stone and hang them around the dress edge ( I already crochet the dress about 1/2 of the exact length I need). I let the stones hang for 2 days, and it worked, the dress was getting longer than before. I was satisfied and proud of myself. I didn't know whether I invented this idea or might be someone had ever done the same way somewhere in this world.

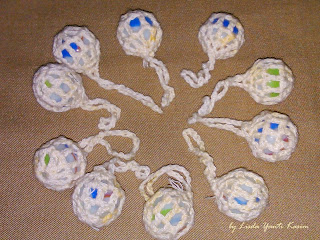
After I discovered that I could use weight to stretch down crochet dress, I thought further to use something else instead of small stones because so hard to get the same or even similar weight. I was worried the crochet dress won't have same length. Suddenly I remembered marbles, I was so excited thinking of them. So I went to buy some marbles. Next step was to think how to hang them without using plastic strap because too slippery . I started to think wrapping each marbles before I could hang them. All of a sudden came into my mind to wrap them by crochet. Taraaa..... here they are;


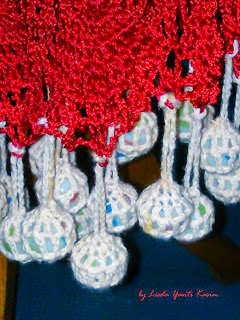
Here the way I use the marbles to stretch down the crochet dress:


Now I will show you how to fasten on and off the marbles in crochet work:

FASTEN ON THE MARBLE:
  1. Determine the space in crochet work as when we want to pin in blocking i.e the tip of a motif. Please refer to image no 1.
  2. Insert the loop of crocheted marble into tip of motif space
  3. Insert the marble through in the loop
  4. Release the marble hung


FASTEN OFF THE MARBLE:
  1. Loosen the crocheted marble's loop
  2. Pull out the marble through the loop
  3. Take out the marble from the crochet work.


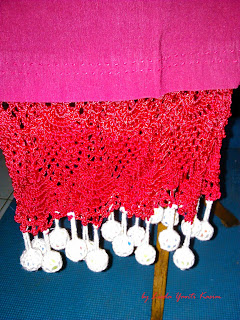
Here I show you after all marbles fasten on and hang on the crochet work:


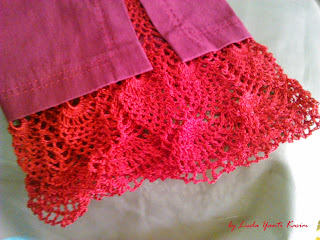
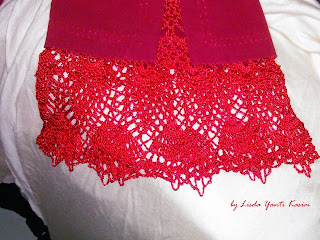
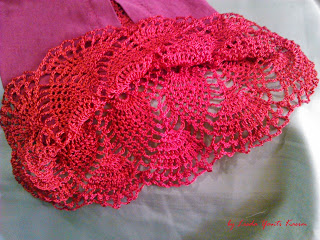
I show you the comparison between before and after stretch down (blocking) by marbles:

Before


After 2 days


Before


After 2 days


Isn't that awesome, looked so beautiful after stretched down (blocking)
I feel wonderful, satisfied, blessed.... Alhamdulillah for the knowledge given by Allah


Sunday, October 12, 2014

Hanging Caterpillars Scarf (was designed in 2011)

One day I found a picture of a scarf which I think is very unique and interesting. The style is consist of small spirals.

Before I
saw that scarf, I've ever thought of making a scarf that consist of small spirals but still couldn’t  imagine how it would look like. After I saw that picture, immediately I remember my idea and it was similar to what I wanted to make. By improvised materials i.e. using local cotton thread and colors available at home plus without any pattern, instantaneously I imitated and made the scarf.

The first one I made was
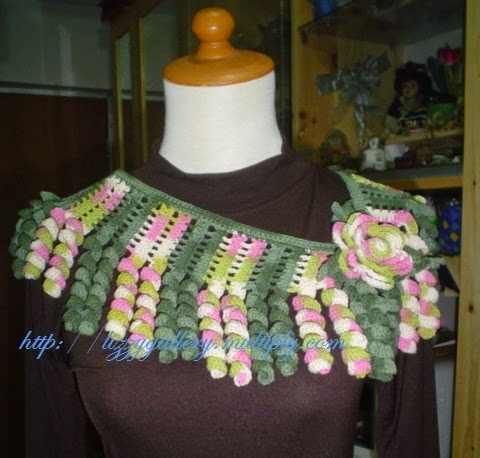
using  the dominant color of dark green. I used trial and error method to decide length and width of the scarf. When it finished, I put it on  mannequin to have a look, I feel satisfied because the result was similar to my original idea. After that arose another idea to wear it in several different ways, but I need a brooch as fastener at two ends of scarf.  I make a rose brooch in matching color to scarf. Here are pictures of the scarf in several  different style on neck, and even well worn on waist or hips.


Around March 2011, in some regions
( in Indonesia) were infected with caterpillar outbreaks in very large numbers. Citizens overwhelmed by their fruit trees, especially mango trees, all leaves are devoured by caterpillars. Their houses were also entered by caterpillars. The government also overwhelmed to eradicate this epidemic, but some kids were enjoying this epidemic and playing with caterpillars without fear of irritation.

When I heard the caterpillar outbreaks news and saw th
e scarf, focus at the spiral part, I suddenly imagined it as caterpillars were hanging around. So I named the scarf: Hanging caterpillars Scarf.

On May
 27-29- 2011, I was invited by a friend to join an exhibition, with knitting as the theme. On the first day, one visitor, interested in my Hanging caterpillars scarf, she interested in buying it but still did not agree with the price. The lady bargained for half price, but I stick to the price I specified because I thought it is not too expensive (it is appropriate enough with the materials and efforts of making it). She went away. But when I was about to go home, all of the sudden she came back, and still bargained the price but she rose up slightly from the original bid. After negotiated with my friend, we agreed to sell it to her, because I was  glad there were someone who has the same taste and appreciate my work. I was so proud, finally the lady bought my scarf. The lady said that she loved all crochet works.. Unfortunately I could not remember the lady’s name. This is my bad habit, easy to forget someone's name. The good thing, before she went away, we requested her willingly to take picture wearing the scarf as memorable and gratitude. Alhamdulillah at least, I could remember the lady’s face.

After the
exhibition, I really missed my first Hanging caterpillars scarf. To cure my longing for it,  I made the second one, still using the materials and colors available, but this time I used maroon as the dominant color, just to make a different. It was completed in 3 days.


This is the short story behind the making and naming processes of this Hanging caterpillars scarf.


PATTERN:

Abbreviation:

Ch - Chain
Sc - Single Crochet
Hdc - Half Double Crochet
Dc - Double Crochet,
St (sts) - Stitch (Stitches)
Sp - Space
Dc2tog - make 2 double crochet at the same times at the sts stated.

Row 1: ch 7 (for a flat base - could be more or less depending on the desired width of the base) plus ch 35 for the spiral (
you could add/reduce number of ch - depend on desired length of spiral), ch 1, sc into 2nd ch from the hook, 2 hdc into next ch, 3 dc in next ch, (1 dc into next 2 ch, 4 dc into next ch) repeat 32 times, 1 dc into last 7 ch.

Row 2: ch
5, skip 2 st, 1 dc into next st, ch 2, 1 dc into last st, ch 35, turn

Row 3: ch 1,
1 sc into 2nd ch from hook, 2 hdc into next ch, 3 dc into next ch, (1 dc into next 2 ch, 4 dc into next ch) repeat 32 times, 1 dc into next st, * 2 dc into next 2 ch sp, 1 dc into next st *, repeat  **, 1 dc to the last st.

If
you wish to have fixed width for the flat base:
Next rows : repeat row 2-3 until the desired length of scarf complete
.

If
you wish to have flat base ; narrow at both end and wider in the middle (i.e. start from about 2 cm wide on the first end, about 6 cm in the middle, and then narrowed again at the other end same as the previous end (2 cm), follow the next step:

Row 4: ch 5, skip 2
st, 1 dc into next st, 2 ch, (1 dc into next st, 2 ch, 1 dc into same st), ch 35, turn,

Row 5 and every odd row: repeat row 3

Row 6: ch 5, skip 2 dc,
1 dc into next st, * 2 ch, 1 dc into next st*  repeat **, ch 35, turn

Row 8: repeat row 4
Row 10: repeat row 6
Row 12: repeat row 4

If the width of the flat want to be more wide, repeat row 8-12 one or more times to the desired width.

Row 14 and the next even row: repeat Row 6 - If you still want more length can be added
. (in this scarf made up to row 94)

Now the width of the flat began to be reduced


Row 96: 5 ch, *skip 2 sts, 1 dc in the next st, 2 ch* repeat from ** until remain the last 6 sts, skip 2 sts, dc2tog in the last 3rd and 6th  sts, ch 3, turn

Row 98: repeat row 6
Row 100: Repeat row 96

Row 102: Repeat row 6 - for the width that
is added; the decrease rows (rows 98-102) must be repeated same as rows are increased.

Row 104: 5 ch, skip 2
sts, 1 dc into next st, 2 ch, skip 2 sts, dc2tog  in the last 3rd and 6th sts, ch 35, turn

Row 106: Repeat row 2

Row 107 (the latest row): repeat row 3

Edging:
1 sc along edge of the flat part. Can be used one dominant color yarn or each row using each color of yarn used. The width of the edge is free.

Note: the number of increased row should be the same with the decrease one. 


I apologise if there is some missing in this pattern and please correct me.