Labels

General (3) Guidance (10) Pattern (10) Project (14) Tunisian (3)

Wednesday, May 27, 2015

Tips; How to hide ends of yarn in knit & crochet nicely and neatly

Assalamu ‘alaikum wa rahmatullahi wa barakatuh :

السلام عليكم ورحمة الله وبركاته
(May the peace, mercy, and blessings of Allah be upon you)

No matter how long the tail we left at the end of work or when we run out of yarn in the middle of work, there would be the ends of the yarn. How could we hide it?

Here the picture showing the ends of yarn in knit and crochet after weave in it:

Showing the ends of yarn in knit

Showing the ends of yarn in crochet


Previously, I had no idea how could I hide the ends of yarn after I weave in between some sts at the back  in crochet, because sometime the ends still show up or slip out again, especially when we use the slippery thread such as nylon or rayon.
Actually, it won’t be so hard to weave in the ends in crochet especially in dc, hdc or sc sts. We can weave in between loops of sts at the back side. The harder one is when the end of yarn is in long ch sts.

I remember, once when I went to a sewing materials shop, I saw something that I did not know what it was. I ask the salesperson what it was, he mentioned the name but I forgot, and then I asked the function. He said it is special glue for material; we need iron to use it. So I bought one, just in case I needed someday.

So I tried to use that glue to solve my problem to hide the ends of yarn in my crochet or knit. 

Below is step by step how I use the glue:


Tools needed:
Hook & special glue for material
How the glue look like
IN KNITTING

Step one: 
Weave in again the ends of yarn by insert hook into a st near the ends, and pull out slowly and carefully so all strands will be in the st.


Step two:
Ripped some glue, just enough to glue the ends.


 Note:
Don't use too much or too thick of the glue, because it won't melt well when we iron it.

Step Three:
Insert again the hook into the same st when we waven in the last ends


Put the glue under the hook, and the pull out slowly


Tidy up the glue in between the st and the ends, so the glue won't be too thick and coagulated.


Place it in flat area and put the iron on top of st where the glue and ends position. Press the iron for few seconds until the glue melted. If necessary we can also iron it from the othe side.
* Remember don't over heat the iron, adjust the heat that suitable for the type of yarn.


Here the result after ironed. It look neate enough.
The area of the ends might be felt little bit rigid but it won't ruin the testure of sts and the ends will fixed there nicely even we wash it.


IN CROCHET

The steps won't be much different from the knitting one. Below are the steps:

- After weave in the ends, insert the hook in between loop of sts where there is the ends


- Get some glue and put it under the hook.
- Pull out slowly and carefully


- After the glue is in the sts, tidy up and the iron it as in knitting.


Here is the result after ironed:


Here I show you some pictures of several area in knitting and crochet where there are some ends.
I don't put any mark at the area for you to find out where are the ends of yarn or whether you can see them at glance.


Tips:
- Try not to have ends in chain work in crochet
- Try to have ends in sc, dc, hdc, etc. work in crochet
- Try to weave in the ends when you have it. Some ends can be woven in along with the next sts.
- Don't wait until all work done. It will be so bored and very frustrating if we wait until the end of work to weave in all tails/ends, especially in big project such as blanket or curtain.

This is my way and my opinion.

Happy crochet and knitting....


Wednesday, May 20, 2015

Neckwarmer & Shawl for MB

Assalamu ‘alaikum wa rahmatullahi wa barakatuh :

السلام عليكم ورحمة الله وبركاته
(May the peace, mercy, and blessings of Allah be upon you)

December last year, a friend of mine (MB) was asking me to make a neckwarmer for himself and a shawl for his mom.  He shown me sample picture of a shawl that he would like to have for his mom. I did not expecting him to ask me to make shawl for his mom because I thought it would take long time for me to make.

He would like to have the neckwarmer made from wool. The color he chose was either grey or red, while for the shawl; I could pick any nice color.

I searched some online shops that I knew for nice yarn, but I couldn't find them. Once I found nice bulky wool yarn but didn't have the color that I needed. 
Last March, I found a nice yarn, although it was not 100% wool (it was only 50% Merino wool) and it was not bulky, but it was the right color I needed which was grey. The yarn was only left 3 balls, I purchased all. I also purchased nice yarns for the shawl; the color I chose was Lemon Drops.

For the neckwarmer; I had to double the yarn to make it little bit thicker. The technique I used was only FPDC (Front Post Double Crochet) and BPDC (Back Post Double Crochet). It took me only one day to finish it.

Neckwarmer with wooden buttons


For the shawl; first, I planed to crochet it, I chose the Pucuk Rebung motif. I chose this motif because I believed it would be so special, as far as I knew no one had ever used this motif in crochet or knit. Pucuk Rebung is a traditional motif used in Songket from Riau. Songket is a woven sarong.  I like this motif because I am from Riau.

I stared to crochet the Pucuk Rebung motif by Fillet crochet technique, however to make just one motif needed almost one ball. To make the shawl I figured out I needed 5  Pucuk Rebung motif plus edging, while I only had 3 balls. I asked the shop whether they still had the same yarn and the same color. My bad luck, they didn't have the same color. I was thinking to combine the color, but I couldn't find other color that match with my yarn. I was kind of frustration and stress. At the end the shop owner said that she had one same yarn and same color, however the yarn was not in complete shape (no more name tag, and had been less about 1 meter). She reduced the price if I wanted to buy that yarn. I bargained little bit, but she didn't agree with the price that I asked. After several times I beg her and rise up little bit the price, finally she agreed. Alhamdulillah.

So I have 4 balls to make the shawl. I believed those yarns still not enough if I crochet it. With very heavy breath taking; I just had to decide to knit the shawl to save the yarn. It was very tough decision for me because I was not a knitter, my knowledge and skill of knit was still very little. So I was kind of afraid whether I could finish it or not.

With Bismillah, I started to knit the shawl. At the beginning I arranged to knit 5 Pucuk Rebung motifs in lace knitting. After half way (almost 2 balls and 7 days) of work, I put it on to mannequin just to have a look, and it did not look good at all, not like what I was expecting in my mind, and it looked too large.  I was kind of sad and confused what should I do. Continue the work or fog it all??? So dilemma..
Again with Bismillah, I decided not to continue the work. I took the other end of yarn from the 2nd ball, I started from the beginning again, at this time I arranged to use 4 Pucuk Rebung motifs with the same technique – lace knitting. Row by row, and day by day I knit the shawl slowly but sure with full of happiness. I was happy to knit.

As I mentioned before, I was not a knitter, so it took me almost one month to finish the shawl.The shawl had completely done  on 3rd of May 2015.

Now this shawl already in Morocco, in the hand of new owner, my friend's mom. Hope she like it and it can keep her warm. 

I have made the pattern for this shawl and can be found in here: Pucuk Rebung Shawl


Pucuk Rebung Shawl


The blue marbles still hang on the shawl 

Pucuk Rebung motif in lace knit
#PucukRebung ; #Songket ; #Riau ; #knittingPattern; #Myowndesign; #Crochetedborder; #IndonesianTraditionalMotif ; #TheFirstKnittingShawlwithPucukRebungMotif


Friday, May 8, 2015

Kembang Sepatu in Tunisian Crochet

Assalamu ‘alaikum wa rahmatullahi wa barakatuh :

السلام عليكم ورحمة الله وبركاته
(May the peace, mercy, and blessings of Allah be upon you)


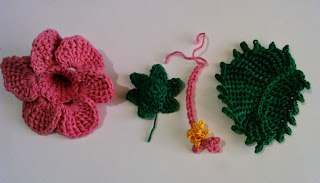
Kembang Sepatu
(Hibiscus) in Tunisian Crochet


In August 18 2014, was the first time I made a flower in Tunisian Crochet. The inspiration I got from a friend who shared how to crochet a flower using Tunisian crochet technique, I didn't know the name of the flower.

Base on that sample, I wanted to crochet a flower in Tunisian crochet too but I did not want to make the same flower. so I search what kind flower I would like to make. I wanted a simple but unique. First name came in my mind was Kembang Sepatu flower (Hibiscus); it is fit to my criteria. It is simple because it is only has 5 petals and the unique about this flower because it has long pistil (style).


The first time I made, I did not realize I made mistake. I made 6 petals instead of 5, however I did not frog it. I kept it as my own remembrance. I found out when I looked at this picture.

My 1st Kembang Sepatu in Tunisian Crochet


I was very satisfy with my own design of this Kembang Sepatu brooch. It gave me idea to make the pattern. Took me few days to make the complete pattern because the pattern is consist of written, diagram and several pictures of step by step process to make one petal. In the pattern, it is not just how to make the flower but also consist of how to make the leaf, pistil and stigma. Don't worry in this pattern I designed for 5 petals flower.


Anyone wish to make this Kembang Sepatu Brooch you can find the complete pattern just by click this name: Kenbang Sepatu

This morning, 27 August 2016, finally I found the real name of the stitch I used in the pattern, called "Tunisian Top Stitch" or "Tunisian Bump Stitch"


Thursday, May 7, 2015

SWANS CONFERENCE THAT WAS TRANSFORMED FROM SWANS SYMPHONY

Assalamu ‘alaikum wa rahmatullahi wa barakatuh : السلام عليكم ورحمة الله وبركاته 
(May the peace, mercy, and blessings of Allah be upon you

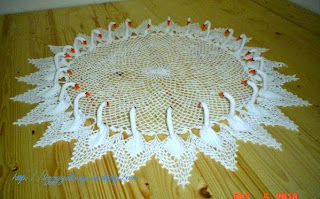
24 Swans Conference
12 Swans Conference


Few years ago a friend of mine at work, introduced me to Google where I could search anything including crochet patterns. So I started to search crochet patterns.
Once I opened a website where I could search for free patterns, a tittle caught my eye; "Swans Symphony", it was a doily pattern.
When I looked at the pattern, I was so amazed with this doily because that was the first time I saw 3D doily. Never cross my mind that it is possible to have 3D doily. All what I know before, a doily or tablecloth must be flat because we need to put things on top of it, on the table. I do really salute to the creation and idea of the designer. Right away I printed the patterns. I forgot to write the website link, I thought would be mentioned in the pattern.

On the front cover of this pattern only stated; at top left corner "A Coats Publication"; at top center "The Needlecraft Design Centre"; and at top right corner "Craft Folio no. 009". At the center of this page stated the name of pattern "Swans Symphony - Swan doilies" and the the picture.

On page 1 and 2, the written pattern.

On back cover consist of pictures of doilies and also the details information of doilies such as the materials required and measurement.

At the bottom stated:
Graphic Design by Coats Design Studio, Paisley

Published by J&P Coats (UK) Limited, 12 Seedhill Road Paisley

Printed in Great Britain by Brian Perry Associates Limited R2114

There wasn't mentioned any name of the doilies designer.

I tried to search again the Swans Symphony pattern, but couldn't find from the same website. I found at http://megan.cc/Swan/

I had tried to make as in the pattern. First time I just tried to make doilies consist of 4 swans. When it finished, It was so beautiful, my sister loved it, so I gave it to her. Next I made the 6 swans doilies, again I gave it to my sister.


4 swans doilies


After I look at the real 3D doily in front of me, I had an idea to make more than 6 swans around the doily. I did some thinking for awhile how could I modify that because all this time I only copy pattern from book. By doing several calculations how to increase the number of swans, several trial and error of enlarging the doily evenly, finally I could make the doilies with consist of 12 & 24 swans. I was so amazed to myself that I succeeded. Here I just want to share the picture of the 12 & 24 Swans doilies. (Sorry it is not very good picture).


12 Swans Conference

24 Swans Conference


My feeling so overwhelming to see all the outcome. I never imagine it became extraordinary. I cannot stop to create more and more something different from this pattern. So I made this swan coaster.

Swan Coaster
I also made 24 Swans Conference in bigger size by double the thread.
This doilies little bit bigger that 24 Swans Conference using single thread and this one is little bit thicker.


Tips to add the number of the swans;

The center of doily should be enlarged. Make sure that the number of loops of the last round is multiplying 4 of the swan amount, due to the distance between each swans consists of four loops.

Example: if we want to make a 24 swans; the loops amount of the last round is 24 * 4 = 96). Beginning with the number of loop in accordance with the desired number of swans; i.e. 24 swans at 2nd round.

There are 4 stages how to add the loops.
  • The first stage; the first number of loops divided by 2 (24 / 2 = 12) which means in every other loop (in multiples of 2 loops) add 1 loop, the loops are added 12, the total loop after increased are 36 loops (24 +12 = 36).
  • The second stage; Total loop at the first stage divided by 2 (36 / 2 = 18) which means in every other loop add 1 loop, the loop are added 18, the total loop after increased are 54 loops (36 +18 = 54).
  • The third stage; Total loop on the second stage divided by 3 (54 / 3 = 18) which means in multiples of 3 loops add 1 loop, the loops are added 18, the total loop after adding are 72 (54 +18 = 72).
  • The fourth stage; Total loop on the third stage divided by 3 (72 / 3 = 24) which means in multiples of 3 loops add 1 loop, the loops are added 24, the total loop after increased are 96 (72 +24 = 96).

* Make 5 rounds for each additional loops stage.


Wednesday, May 6, 2015

LizzY Gallery: Aran Sweaters

LizzY Gallery: Aran Sweaters: Assalamu ‘alaikum wa rahmatullahi wa barakatuh :   السلام عليكم ورحمة الله وبركاته   (May the peace, mercy, and blessings of Allah be upo...

LizzY Gallery: Penny Coin Necklace

LizzY Gallery: Penny Coin Necklace: Assalamu ‘alaikum wa rahmatullahi wa barakatuh :  السلام عليكم ورحمة الله وبركاته  (May the peace, mercy, and blessings of Allah be upon y...

Penny Coin Necklace

Assalamu ‘alaikum wa rahmatullahi wa barakatuh :
 السلام عليكم ورحمة الله وبركاته
 (May the peace, mercy, and blessings of Allah be upon you)


A set of Penny Coin Jewelry

In 1986 (may be around November at that time), in Fresno CA,  a friend of mine gave me a shoes box full of Pennies (1 cent USA money) before he went back home to his country. I was so happy but confuse at the same time receiving this heritage.

Few days later, my mind starting had some idea what to do with those bunch of Pennies. One of my idea was to make necklace. I started to arrange one by one the Penny to form a necklace. When I looked at my arrangement of coins, I started imagine when I wear the necklace and people might comment, I became so exiting.

Next step, I started to think how to joint each Penny. I needed to make hole on each Penny but how?
I skipped thinking to make the hole because I did not have idea and I did not know to whom I should ask. So I went to a hobby craft shop expecting I might had an idea how to joint each Penny.
In that store I found small double loop ring (with diameter 0.5 cm), I never seen like that before. Usually I saw big double loop ring used for key chain holder.

Here some images of big double loop ring and also the tiny one just to give an idea what I mean with double loop ring:


Tiny double loop ring


When I look at the small double loop ring, at glance came to my mind an idea to use it as clamp for the Penny. I was thinking to attach the Penny in between the 2 loop of the ring. So I bought several packed that might enough to make a necklace.

Soon I reached home, with exciting I started to clamp the Penny with the double loop ring without any adequate tools that I can use. I had hard time to do that because it was so hard to open between the loop of the double loop ring to give space to insert the Penny. I only had knife, scissors and nail-cutter. It took me more than an hour just to clamp one Penny with the double loop ring. Once I succeeded but several times fail and some the ring slip out again. I started to give up, and forgot about the Penny necklace project.

Actually I am not a type of person who each to give up on something. After few days I thought again to continue the necklace project but I was thinking to make hole on the Penny instead of clamp it by double loop tiny ring, but how?? Suddenly I was thinking to ask Cipy (my American parent), but I was kind of embarrassed. Due to my ego to have Penny Coin necklace was bigger than my embarrassed, so I went to Cipy to discuss how to make hole on a Penny.

Me: Cipy, can you help me how to make hole on a Penny?
Cipy: Why you need to make it?
(well at that time I did not want to tell him that I wanted to make a necklace)
So I just answered: Well I just want to make something.
Cipy: Give it to me, and I will drill it.
(I was so confuse what was the meaning of drill. That word still not in my English vocabulary list)
Me: What is the meaning of drill?
Cipy: Well drill is to make hole using a tool. So give it to me and I will drill it for you.
(Cipy did not know that I wanted to drill many Pennies)
Me: Can you just teach me how to do it so I can do it by myself.
Cipy: Why?
Me: Well I wanted to drill many Pennies.
Cipy: What??? What will you make? It will against USA rule.
Me: Oh ya??? I did not know that.
Me: What about there is a machine that can make the Penny become flat and emboss with some panorama  as a souvenir?
(So we did not continue to discuss about the USA rules)
I was thinking, what was the harm to make a jewelry out of Pennies. I thought, USA should appreciate at me to wear Penny necklace proudly (Just kidding, I apologise if what I did was wrong)

So, Cipy took me to his garage showing one side of it's wall full of many kind of tools. I was so stunning, I never saw so many tools at someone home in Indonesia before. I was asking why he needed all those tools. He said, he needed them to fix his car and any problem in the house. I just said "Wow!!!" As I knew, in Indonesia, when we needed to fix car, we took it to garage, when we needed to fix something in the house, we just called a mechanic.
Cipy said, "labor is very expensive here, much much cheaper for me to buy all these tools and some guidance books to fix something". I was speechless, I learned something new that never came into my mind before and never been discussed with my father before back home.

After few minutes we were touring in Cipy garage, he taught me how to drill the Penny. When I succeeded to drill a Penny, I was so happy and right away I took all the Pennies that I needed to drill. It took me only 2 to 3 hours to drill all, so I became more exciting, I continued to drill more Pennies, this time for bracelet to match the necklace. For the bracelet, I drilled 2 hole in a Penny across each other.  I was very satisfy when all done.

Further step, I still need to insert the ring into the hole of each Penny so I could attach each other with the Penny in flat position.I attached all the Pennies became one necklace. I was so happy and proud of myself when I tried to necklace for the first time. It looked exactly as how I imagine when I designed it. My first Penny Coin Necklace, my first jewelry design, my first learned how to drill, my first time to understand the word "drill". In that Penny Coin Necklace I learned a lot, such as; how to design, how to do hard job, new philosophy of life, and my vocabulary increased one. Alhamdulillah...

I continued to make the bracelet with the same technique. When all done I still felt something missing which is earrings. Mmmm, I run out of Penny with hole. So I backed to previous way which was just clamp the Penny with double loop ring. Since I only needed a pair of earrings, I did not mind to do harder job. I satisfied when everything completely done as I expected.

Each time I wear them, always someone ask me "Are those real Pennies??" Smiling I answered briefly "Yes"
Anyone asked me how I made it, and then I told them a short story behind the Penny Coin Necklace.

The idea of making necklace from coin appeared again when I came back to Indonesia. Around year 1995, I got several 1 Cent coin Singaporean money from my nephew. I asked a mechanic at place where I worked to drill the coins because I did not have the tool. Here in Indonesia, I could find a store where sold tiny double loop ring, so I just used regular and available chain at store.
Beside made the necklace I also made made bracelet and earrings to match, but after few years, I loose the earrings.

Below is the picture of necklace and bracelet of 1 Cent Singaporean Coin:

Serupa tapi tak sama (similar but not same) with My Penny Coin Necklace
This is a short story of part of my life journey.


Tuesday, May 5, 2015

Chinese Button Knot

Assalamu ‘alaikum wa rahmatullahi wa barakatuh :
 السلام عليكم ورحمة الله وبركاته
 (May the peace, mercy, and blessings of Allah be upon you)


Chines Button Knot

Chinese Button knot is one of my favorite button.I like it because it is so unique and need special skill to make. This kind of button can be made by the same material with the dress/blouse itself.
It has  been several times I made dress using this kind of button. A simple design dress will be looked so stunning if use Chinese button knot as decoration.

I have seen several tutorials in youtube and some books how to make the Chinese Button knot. By practicing many times, at the end I can make it.
Below is step by step tutorial, how to make the Chinese Button Knot:

First, get about 30 cm length of ready used cord or you can DIY from the materials of the dress. 

STEP I


Make 1st loop

STEP II

Make 2nd loop over the 1st loop 


Hold the two loops at center point of it - it shows there are 3 holes.
The left hole is from the 1st loop; Then center hole is the joint hole of 1st loop and 2nd loop; The right hole is from the 2nd loop 

STEP III - to make the 3rd loop is by weaving in and out through the 3 holes


Insert the right end into the right hole from in front to the back side,


Continue to insert the right end into the center hole from back  to the front side,


Next, insert the right end into the left hole from in front to the back side.


In this stage, the 3rd loop is done,

STEP IV (LAST STEP) - TO SECURE THE WOVEN


Insert the right end into the 3rd loop from in front to the back side,
(in this image you can see the 3 holes divided by two for each hole)


Continue to insert the right end from the back side into the bottom part of center hole


In this stage, all 4 steps are complete. 

FINAL STEP; is to tighten each part of the woven by  pull it out slow but sure. 
Finishing - gather the 2 end of the cord before attach it on the dress/blouse by hand sewing.

Below some samples: